Friday, March 7, 2014

Swap #1 Spring Cleaning

Edit: Sign-ups are now closed.

I'm so excited to announce our first swap for 2014!

One of my favorite Hayao Miyazaki movies. Mei is helping clean out their new house in My Neighbor Totoro.

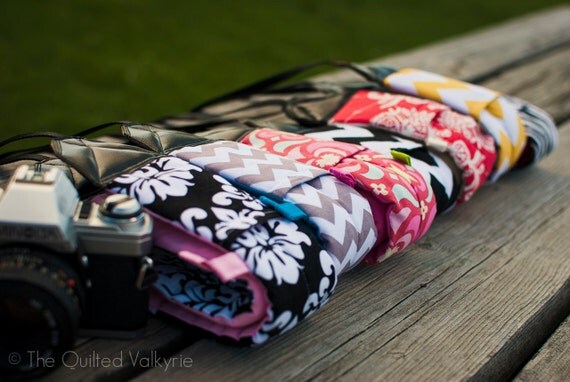
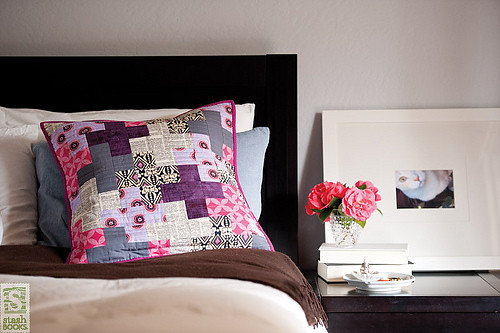
If you're like me, my sewing room could use a little Spring Cleaning (organizing your goodies that don't have a home). Keri helped me come up with this idea and I thought it was a great new idea for a swap.

This will be a blind swap. So you're swap partner will have someone else's name. I would like you all to create a board on Pinterest of organizers that you like. I made a board with a lot of different examples that you can choose from. I will continue to add pins to it over the next few weeks. Please have at least 3 different examples like a sewing machine mat, thread catcher, or fabric baskets. Choose a wide range of sized items as well.


Sign ups will be open until Friday, March 28th. You have 3 weeks to gather your pins together and get me your information. Partner information will be sent out between March 30th and April 1st.

This swap will be open internationally.

Update (9 March): I'm so sorry, knew I was forgetting something. The mail out date or these will be April 30th. 

Partner information will be sent out


Be sure to scroll to the bottom of the form to fill out all the information. I have a lot of questions.

Be sure to tag your pictures with #SpringCleaningSwap.

Let's get ready to kick some dust bunny butt!

Amanda

Monday, March 3, 2014

March BOM - Hexagon Spiderweb Block

March is an awesome month. It's Hexagonal Awareness month and March 14th is Pi and Save a Spider Day.

Let's talk about hexagons. There are many ways to make hexagons: paper pieced, template, pre-cuts, etc. You can sew them by hand or machine. There are a lot of different patterns from traditional Grandmother's Flower Garden, HexyMF by Katy of A Ginger Monkey, to modern asymmetrical ones like the one we're going to make by Pink Chalk Studios.

Here are a couple that I've made. 

These were made using an acrylic template and sewn on my machine.


I made these by hand using paper templates.


So this will be a super easy machine sewn Spiderweb Hexagon. I usually have to have everything symmetrical, but I really like the look of these hexagons. Spiderwebs usually are woven to the area that they find and aren't always symmetrical. I think that these are the perfect combination of the two patterns. Pink Chalk Fabrics has an easy to follow instruction on how to make your hexagon blocks. If you want to have a symmetrical hexagon you can print a template off on foundation paper and paper piece the strips.


Be sure to post your pictures to our Facebook group, Flickr group, or both.

Happy stitching.

Friday, February 21, 2014

Really Late February Block - Dawning Snowflake


I know this is late and I am so sorry. I just realized tonight that I hadn't linked the post to the next block up in the Misfit blog. I will wear my cone of shame for...  squirrel! 

Thank you so much to Keri (@thequiltedvalkyrie). She hosted the BOM this month on her blog. She picked out a super cute paper pieced snowflake block for us. Click on the image below to go to her tutorial for the block.


While you're at it, check out her Etsy store for super cute camera and gadget goodies. Click on the link below to check out her shop.


Wednesday, January 1, 2014

January 2014 BOM block.

I'm so excited to be having our first block of the month. I hope everyone had a wonderful New Year's celebration! I thought we'd start the year off with something pretty simple. It is basic snowball blocks. It has some applique, embroidery, and buttons. Make your snowmen the way you want. Make this your own!

I had started out with doing a 12.5" and 6.5" unfinished blocks, but my quilt math was off on my 6.5" block, so I'm changing it to only being a 12.5" block.

*All seams will be 1/4 inch.

Grab your scraps and lets get to cutting.

You'll need a background fabric (I used blue), white for the snowman, and scarf fabric (I used red).

  Cutting instructions for the 12.5" unfinished block.

Background fabric:
(2) 3.5" x 5"
(2) 4.5" x 4.5"
(2) 4" x 5.5"
(12) 1.75" x 1.75"

Snowman:
*One each.
3.5" x 3.5"
4.5" x 4.5"
5.5" x 5.5"

Scarf:
1" x 5"

Construction:


1. Draw diagonal lines on the wrong side of the 1.75" x 1.75" background fabric squares.


2. Sew the 1.75" squares onto the corners of the Snowman blocks right sides facing. Follow the line that you drew on.

 Note: On the smaller white block, you might want to offset or trim the background square down to 1.25" or 1.5" so that it has a "rounder" head.


3. Trim your corners 1/4 inch from the line/seam.


4. Press your seams. You can do this however you prefer. I pressed mine to the blue background so that they wouldn't show through the white.


5. Sew the background squares to the snowman squares.


* Sew in the following order.
~ 3.5" x 5" background to opposite sides of the 3.5" square snowman block.
~ 4.5" x 4.5" background to opposite sides of the 4.5" square snowman block.
~ 4" x 5.5" background to opposite sides of the 5.5" square snowman blocks.

6. Make and sew on the scarf.


* To make the scarf, lay it on your ironing board. Fold the long sides together to meet in the middle and press. It will make a 1/2" x 5" rectangle. Fold and press one short end in 1/8" to 1/4" to make a finished end.

(I forgot to take a picture of that pressing part, so this is what it should look like.)

* Lay your scarf on your snowman with the finished end at the snowman's neck. Pin the end in place. Bring your scarf to the other side of the snowman's neck and decided if you want your snowman to be standing or doing a headstand. For standing, bend the scarf towards the bottom of the snowman. For doing a headstand (in picture), bend the scarf towards the top of it's head.

* I made two bends. One at the neck and one at the straight side of it's head. Pin at the bends and then at the end of the scarf.
* Start sewing at the fringe end, leaving 1/2" to 3/4" at then end. Edge stitch around the scarf. When you get back to where you started, sew back and forth a few times to secure it and keep it from unraveling.

* Trim the end of the scarf to make fringe.


7. Embroider the arms on and add buttons/embellishments. 
*I need to sew the buttons on and embroider the arms.


My 6.5" snowman block ended up being 5.75". I added a border and will end up using it as a small mug rug or a coaster.


Monday, May 13, 2013

May Pillow Pop Sew Along Week 3

I hope all the Mama's out there had a wonderful Mother's Day! 

We went out to eat with my family and went fishing. I found a sandpiper's nest and 4 spotted eggs.


So this week we should have our tops finished and we are going to sandwich it and quilt it! How are you all coming along?

Sorry I don't have any pictures. I've fallen behind on this one. 

Monday, May 6, 2013

May Pillow Pop Sew Along : Weeks 1 & 2

Wow, so I just realized I missed posting for a week. *facepalm* Where did that week go? So this week we will be playing catch up. If you haven't already, pick out and cut your fabrics and sew all those squares together!

I'm going to have to play catch up and get my fabrics picked out and cut (having a block as to what I want to use). So I will be putting my pictures up afterwards. I'm having a bit of writers block too. Ugh... 

 I'll leave you for now with a picture of Mockingbirds eggs who have taken up residence in my rose bush.


Tuesday, April 23, 2013

May Pillow Pop Sew Along - A Bunch of Crosses

a Bunch of Crosses

Are you ready for another sew along??? We are going to be making Katy Jones' A Bunch of Crosses pattern in Pillow Pop. It's on pages 60 -  63. This is another great use of our scraps!

You can follow Katy on twitter, ImAGingerMonkey, and her blog Monkey Do.

You'll need to pick out 6 assorted fat eighths (pick some solids to match your prints).
A quarter yard of of matching fabric for your binding.
A half yard for backing.
20" x 20" square of muslin and batting.

This month we'll have a little drawing. I have a bunch of 2-1/2 inch squares (great if you are making a Scrap Vomit quilt). To be eligible for the drawing, you'll have to upload a picture of your finished pillow to the Misfit Quilters Flickr group. If you do not have a Flickr account, just email me your picture and I will upload if for you. Upload your picture by May 30th. I will draw a winner on May 31st.


Schedule for this sew along.
Week 1: Picking out and cutting fabrics.
Week 2: Sew pillow top (all of the small squares together).
Week 3: Pancake and quilt your pillow top.
Week 4: Finish pillow (sew pillow back and binding on)
Week 5: Make sure to have your picture uploaded by May 30th.