I'm so sorry for getting week 2 out a week late. It's been a crazy week. We put our cat, that has been with my inlaws for the last couple years, to sleep today. He has been sick and the vet didn't know what was wrong. He was 13 yrs old.
Well during week two I actually had us scheduled cutting the fabrics (which we did in week 1, so we're not behind).

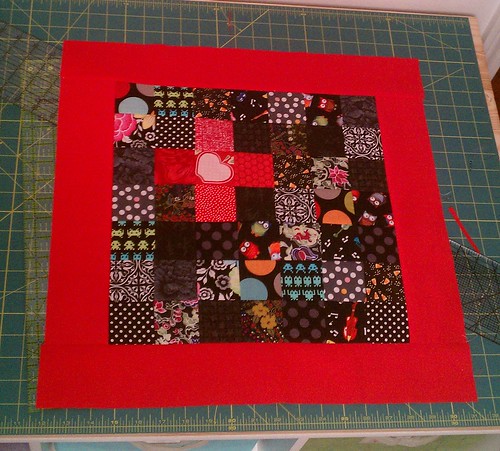
Week 3: Sewing the top and Quilting.
We'll be arranging our fabric squares and sewing them together. We will start by sewing the squares together by rows and then aligning our seams and sewing the rows together.


Tip: Press the seams in a row in the opposite direction as the one before it. Look at the top two rows as an example. It will give you less bulk when pressing the seams between the rows.
Next we will sew our borders on. Do the shorter borders on the sides first and then the top and bottom borders. *Remember that you needed to add half an inch to the cutting instructions in your book to the length of each border.
Now for our final step of the week. We will pin sandwich our layers. Place your muslin on the bottom. Batting on top of the muslin and center your pieced top on the batting. If you want to straight line quilt it as Heather did, draw a line in the center of your cross vertically and horizontally. I pinned around the area to be quilted.


(My needle fell out several times while I was quilting. lol)
Happy Stitching,
Amanda
Coming up: Week 4 - Finishing our pillows!
1 comment:
I'm sorry to hear about your kitty :( We have a cat who is with my in-laws too. She was our first baby and is nearly 16 years old. I'm not looking forward to the day we have to make the same difficult decision you just made.
I have my pillow top all sewn together already (minus the borders). I'm excited to add those and get it quilted this week!
Post a Comment